Creating Products with Azure Media
Once your Azure integration is set up and enabled, any media you attach to a product - images or PDFs - will automatically be uploaded to Azure Blob Storage. Here's how to create a product and attach media to it.
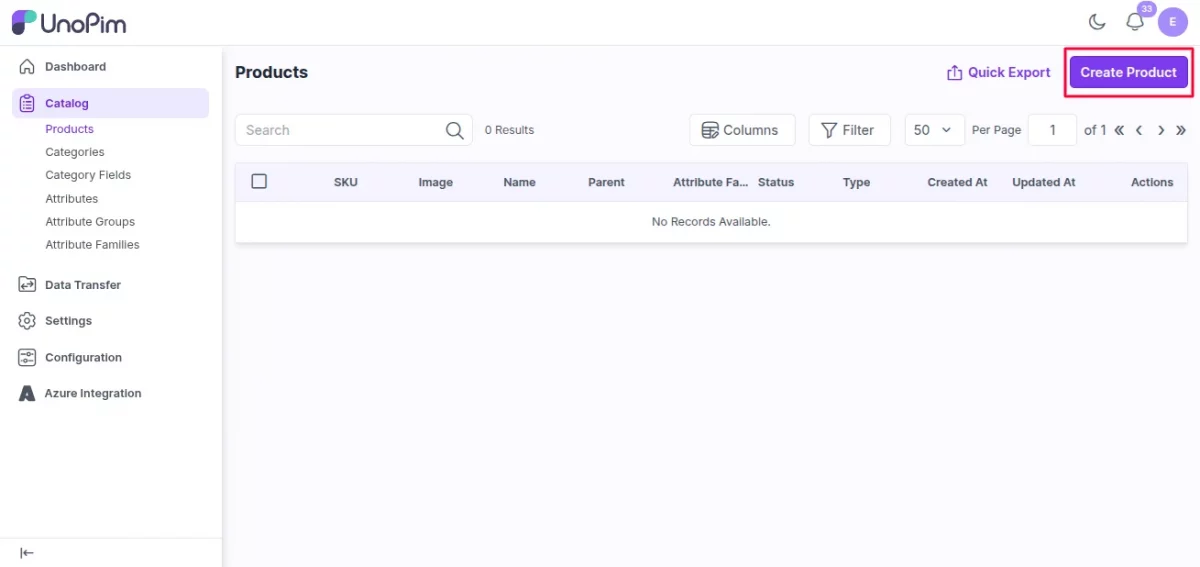
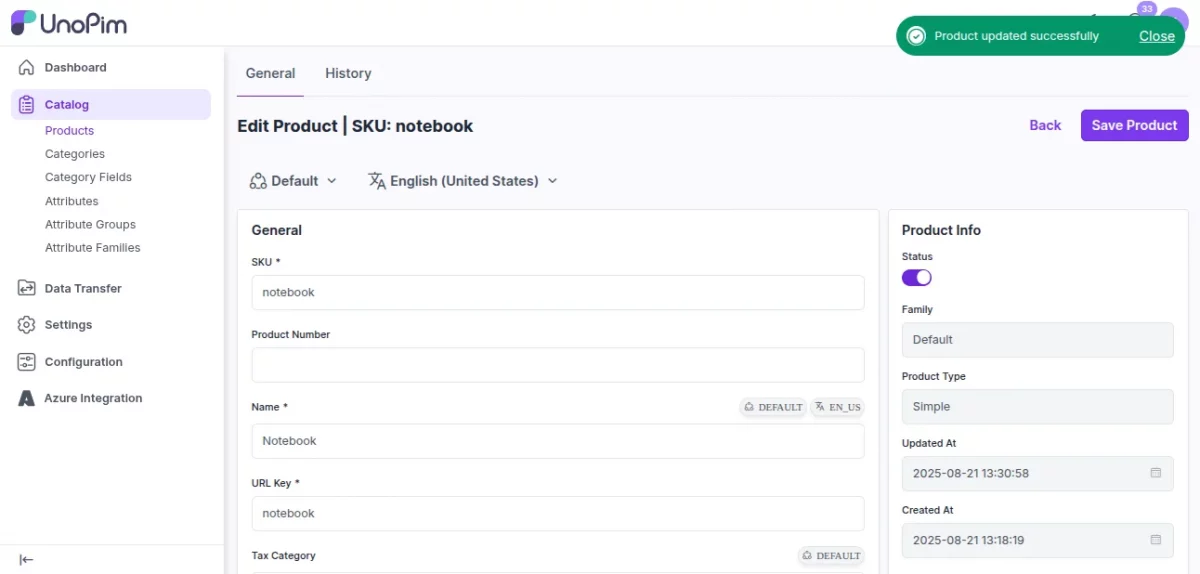
Step 1 - Create a New Product
Go to Catalog → Products and click the Create Product button.
Fill in the following fields:
| Field | What to enter |
|---|---|
| Product Type | Select Simple for a standard product, or Configurable for a product with variants |
| Family | A family named Default is already available - select it or choose another if you've created custom families |
| SKU | Enter a unique identifier for the product |
Note: The SKU must be unique across all products. No two products can share the same SKU.
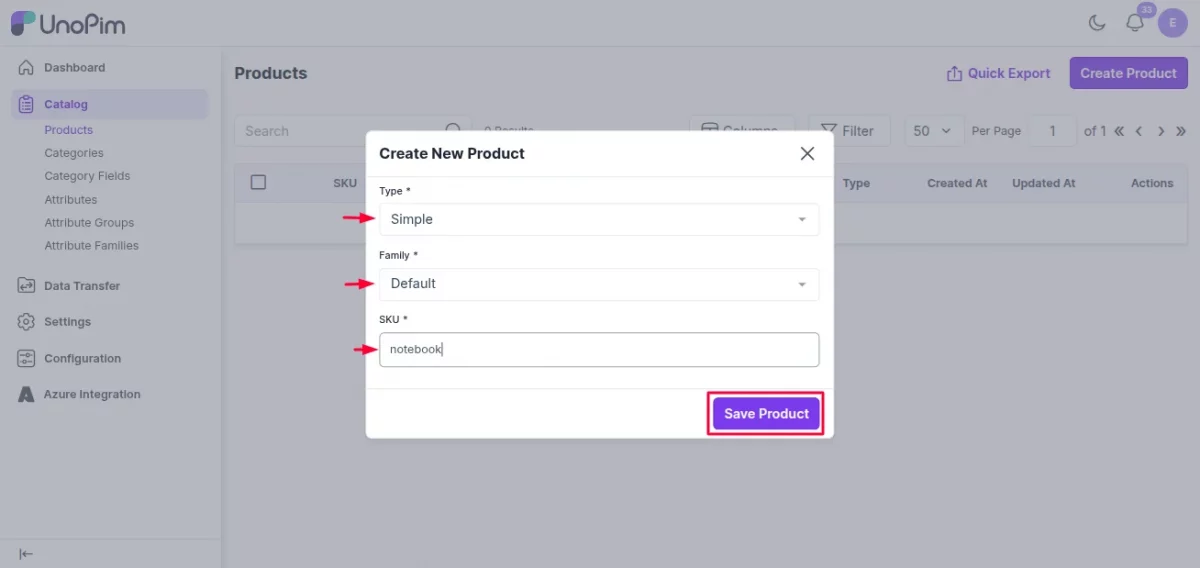
Click Save Product to continue.
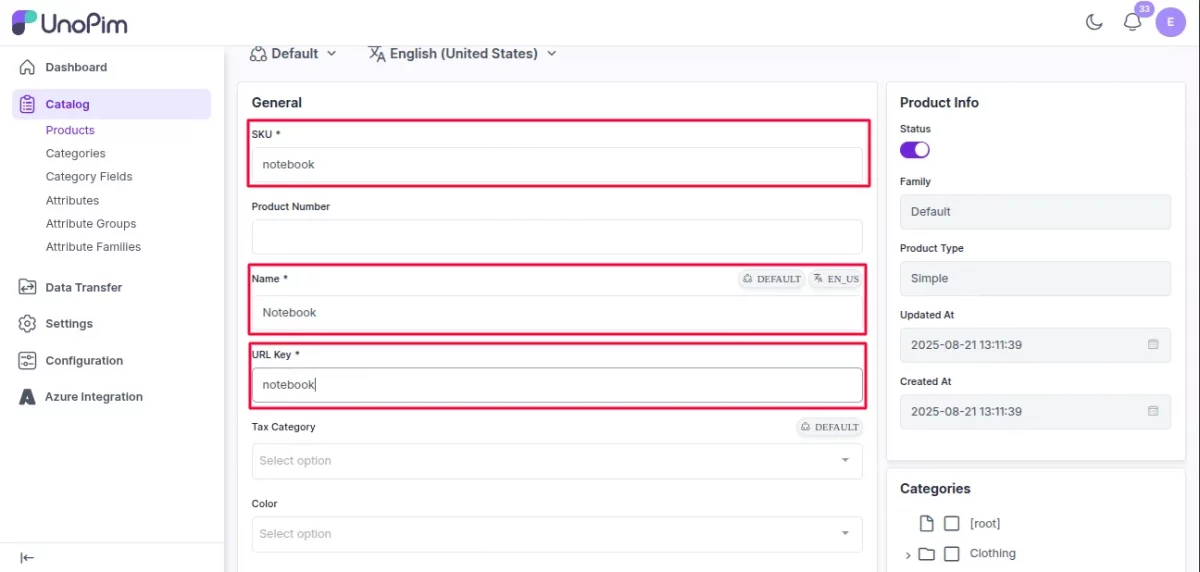
Step 2 - Fill in the Product Details
After saving, you'll be taken to the product edit page. Complete the following fields:
| Field | Notes |
|---|---|
| SKU | Auto-filled from the previous step |
| Name | Enter the product name manually |
| URL Key | Auto-filled based on the product name |
| Short Description | Enter a brief summary of the product |
| Description | Enter the full product description |
| Price | Enter the product price manually |
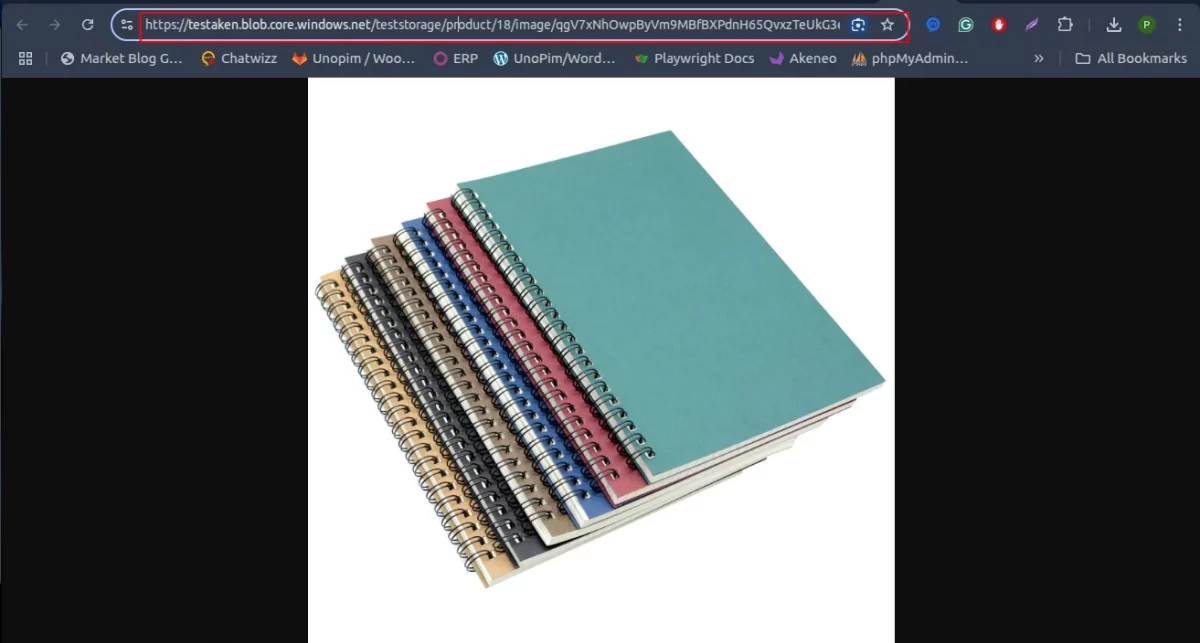
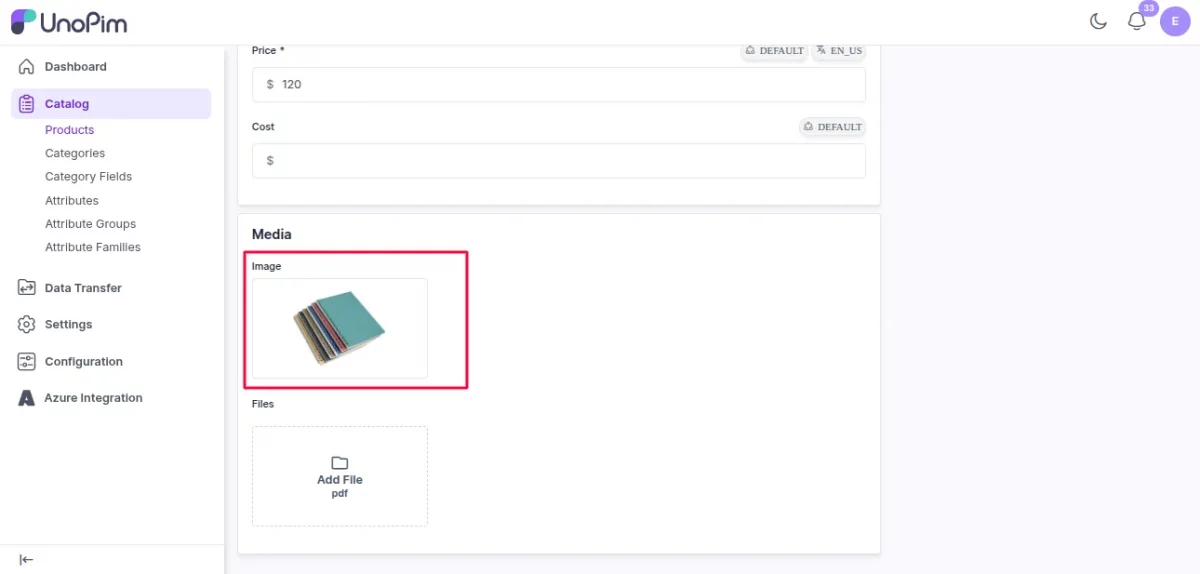
Step 3 - Add an Image
In the Image attribute field, click to select and upload a product image. Once uploaded, the image will be stored directly in your Azure Blob container and the product page will display its Azure Blob URL.
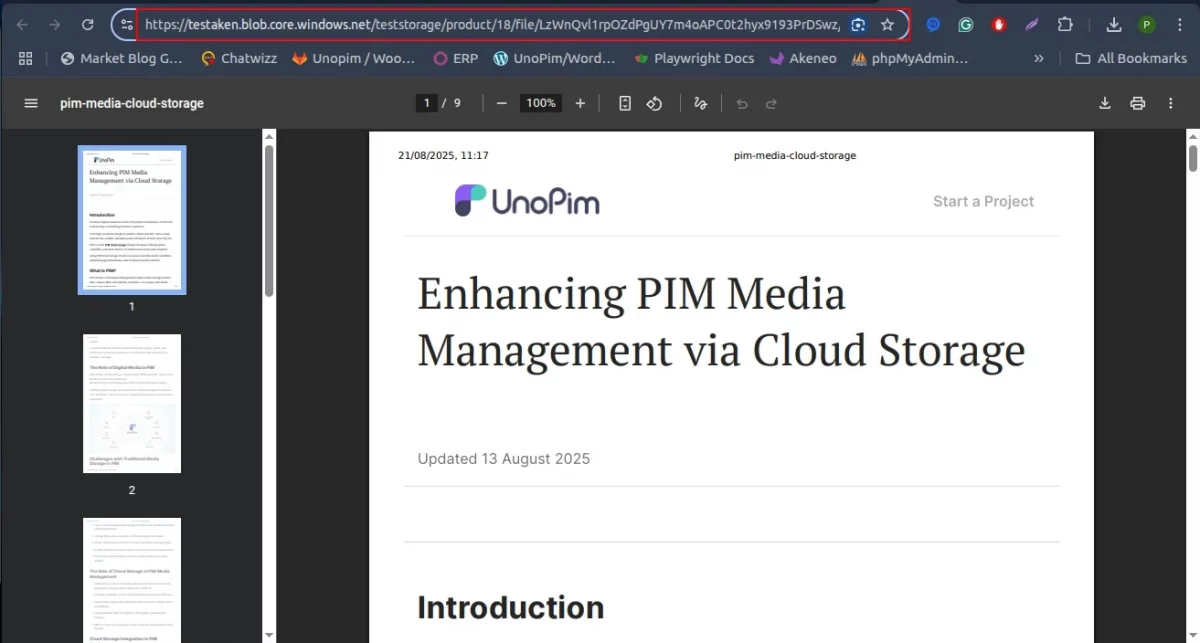
Step 4 - Add a PDF File
In the File attribute field, select a PDF file to attach to the product.
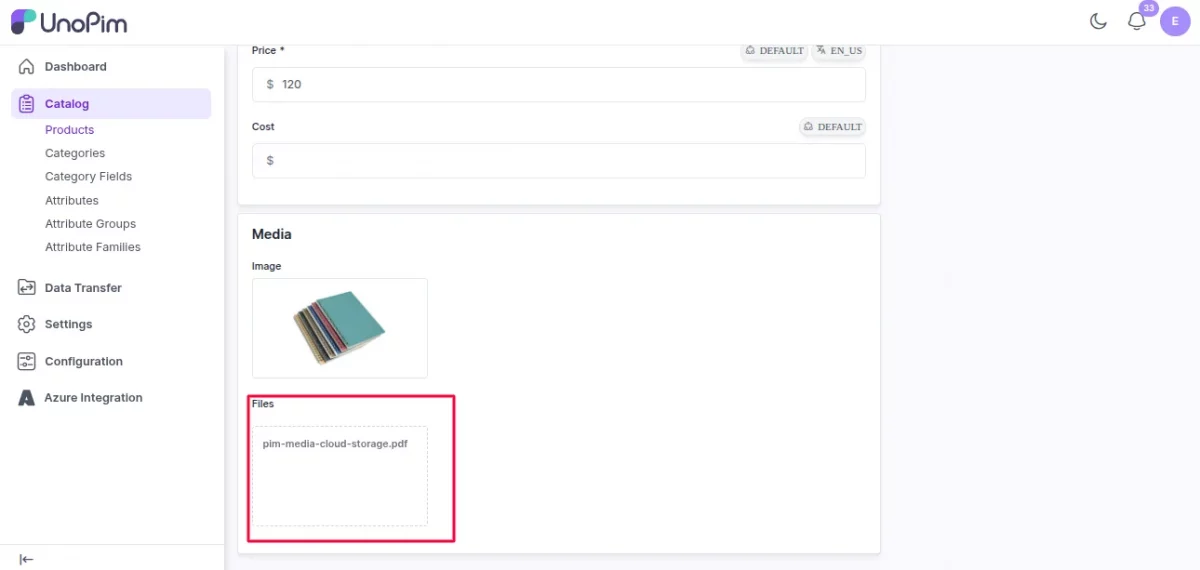
Note: Before you can attach a PDF, you need to first create a File type attribute. See the section below for how to do this.
Creating a File Type Attribute
If you haven't already created a file attribute, follow these steps:
- Go to Catalog → Attributes and click Create Attribute.
- Fill in the following:
- Code - enter a unique code for the attribute (e.g.,
product_pdf) - Type - select File from the dropdown
- Label / Name - enter a display name for the attribute (e.g.,
Product PDF)
- Code - enter a unique code for the attribute (e.g.,
- Click Save Attribute.
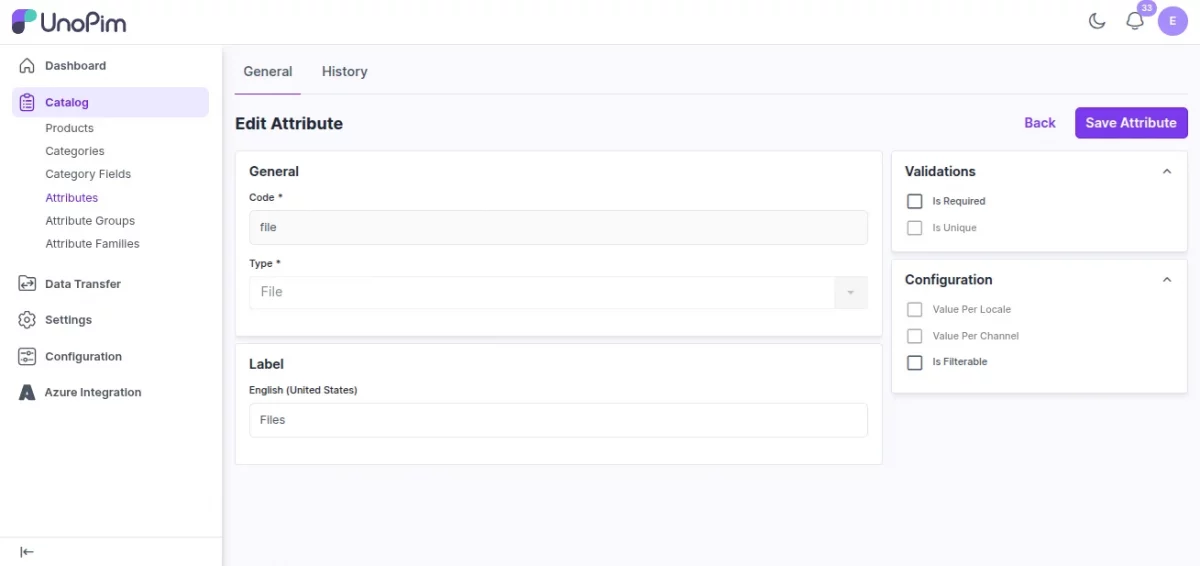
Note: The File type attribute in UnoPim currently supports PDF files only.
Once created, this attribute will appear on the product edit page under the file attribute section, ready for you to attach PDFs to your products.
Step 5 - Save the Product
Once all fields are filled in and your media is attached, click Save Product at the top of the page.
After saving, both the image and the PDF file will show an Azure Blob Storage URL - confirming they have been successfully uploaded to Azure and are being served from the cloud.