Creating a Scheduled Job
Once the Job Scheduler is installed, you'll find the Job Scheduler option in the left sidebar of your UnoPim dashboard. Click on it to expand the menu - you'll see three sub-sections:
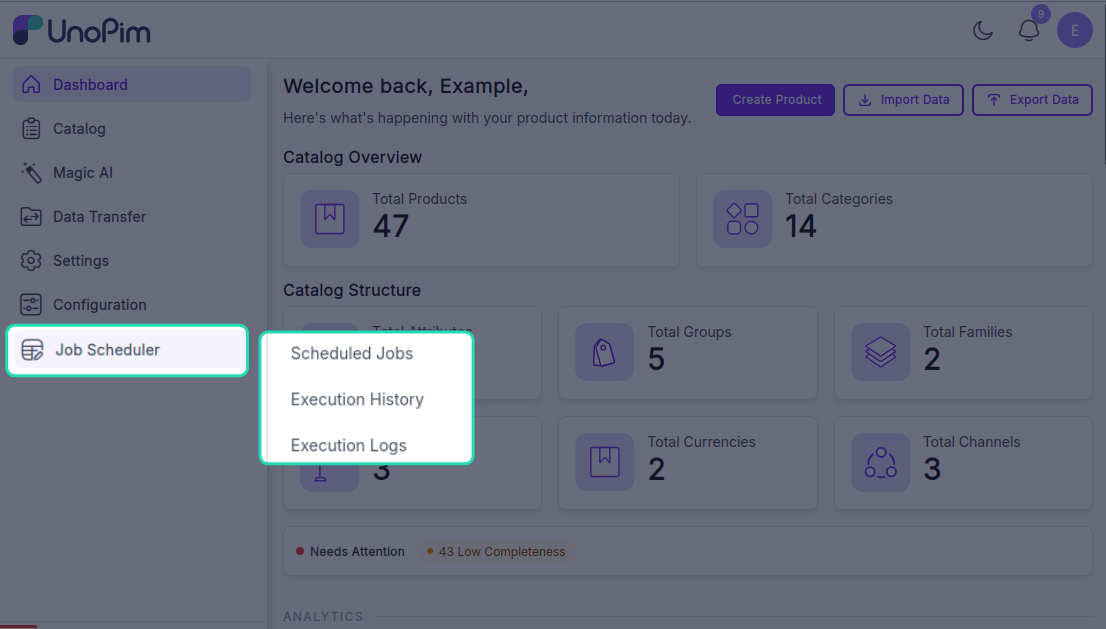
- Scheduled Jobs - view and manage all your scheduled jobs
- Execution History - see a record of past job runs
- Execution Logs - view detailed logs for each execution
Go to the Scheduled Jobs section and click Create Scheduled Job to set up a new automated job.
General Settings
Fill in the following fields to define the job:
| Field | What to enter |
|---|---|
| Name | A descriptive name for the job (e.g., Daily Category Export) |
| Code | Auto-generated from the name - e.g., daily_category_export. You can change it if needed. |
| Type | Select whether this is an Import or Export job |
| Entity Type | Choose the data type the job will work with - e.g., Products or Categories |
| Job Instance | Select the existing import or export job you want to schedule |
| Status | Set to Active to enable the job, or disable it to pause scheduling without deleting it |
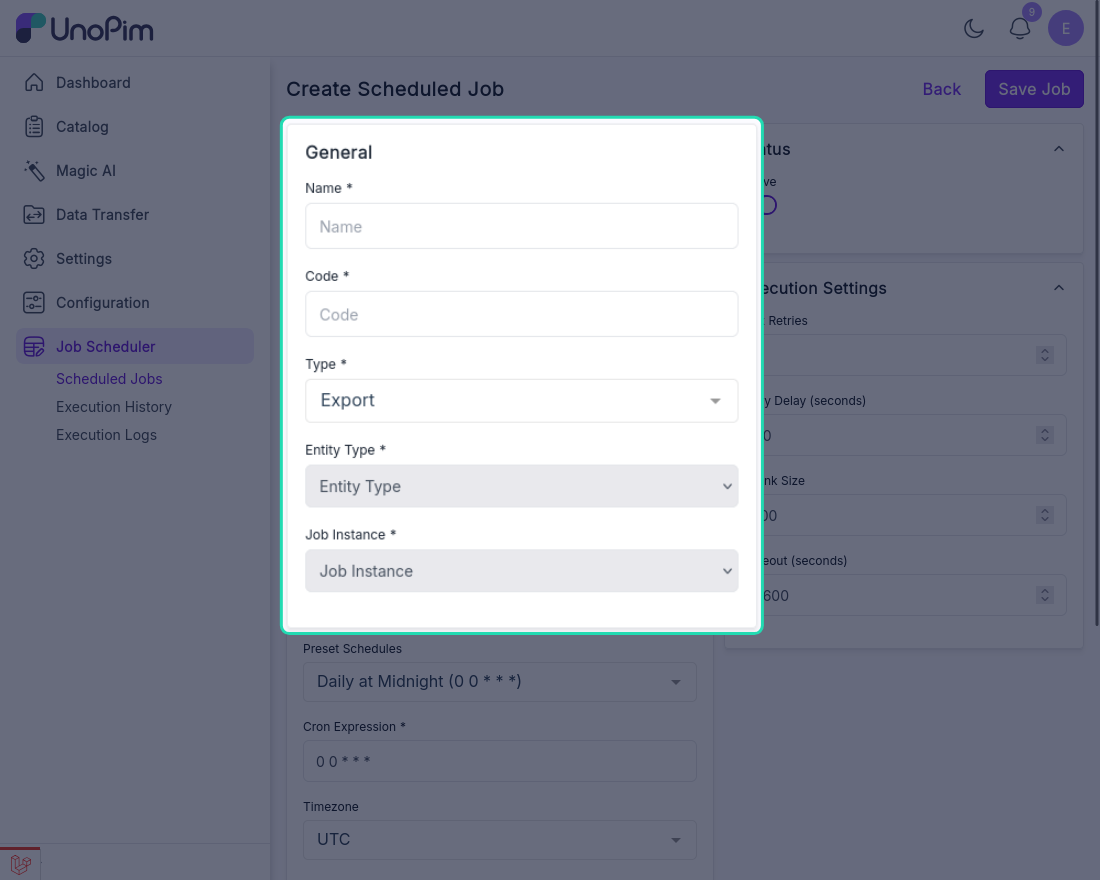
Important: The Job Instance list only shows jobs that already exist in UnoPim. Before scheduling a job here, make sure you've already created it under Data Transfer → Imports or Data Transfer → Exports. If you don't see the job in the list, create it there first and then come back.
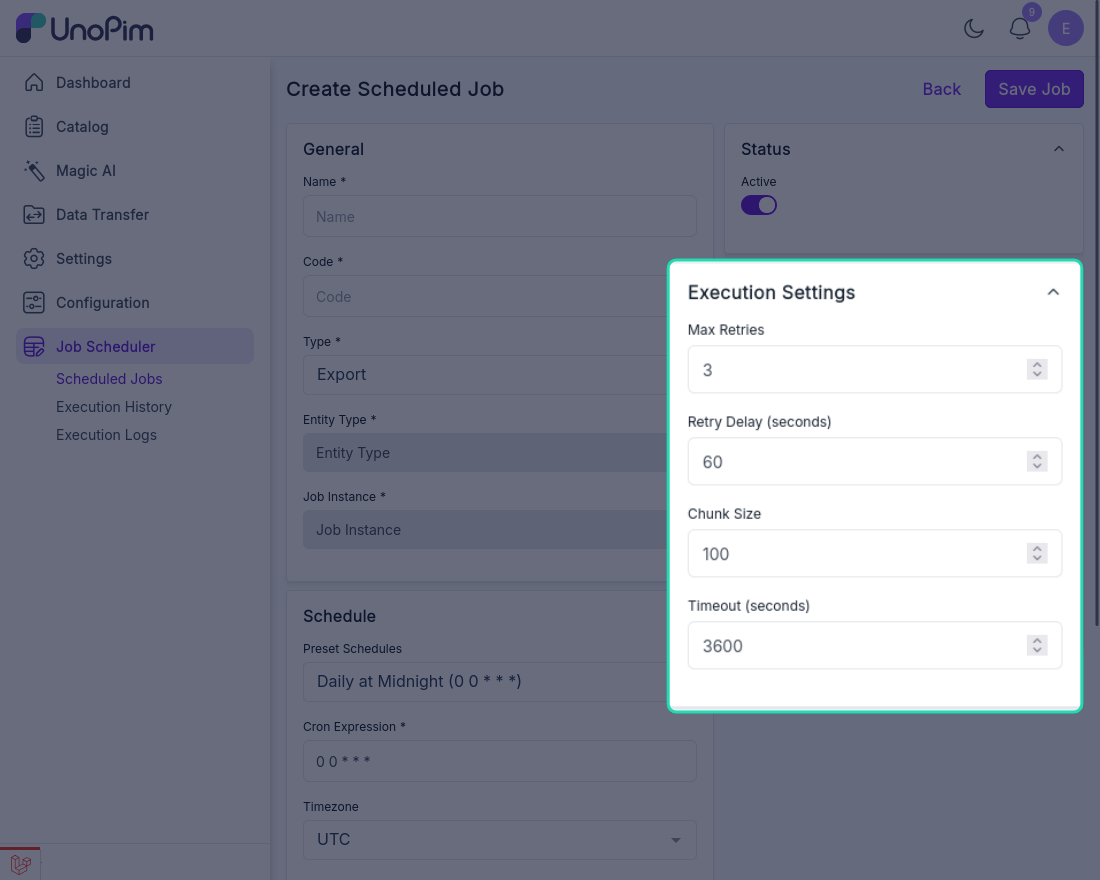
Execution Settings
These optional settings control how the job behaves when it runs:
| Setting | What it does |
|---|---|
| Retry Attempts | How many times the job should automatically retry if it fails |
| Retry Delay | How long to wait (in seconds) before retrying after a failure |
| Chunk Size | How many records to process in each batch - useful for large datasets |
| Timeout | Maximum time (in seconds) the job is allowed to run before it's stopped |
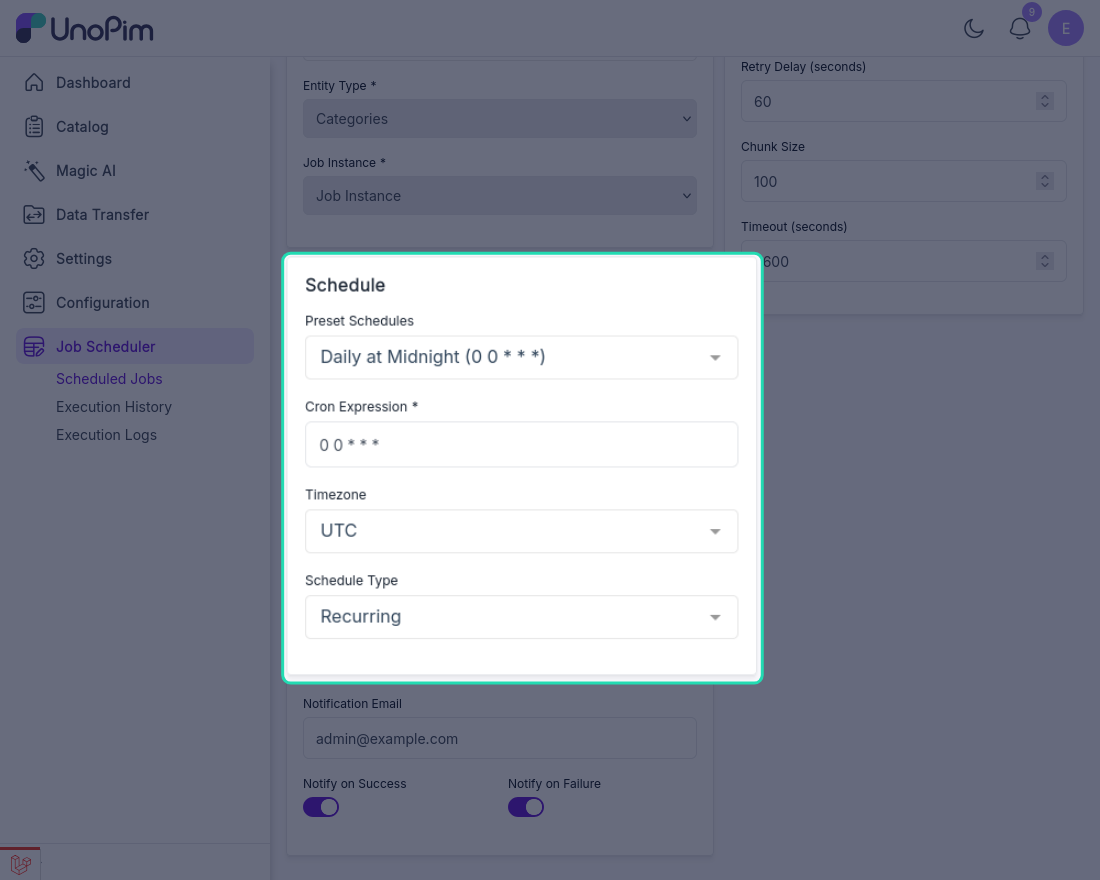
Schedule Settings
Define when and how often the job should run.
Preset Schedules
Choose from a list of common schedule options:
| Preset | Cron Expression |
|---|---|
| Every Minute | * * * * * |
| Every 5 Minutes | */5 * * * * |
| Every 15 Minutes | */15 * * * * |
| Every 30 Minutes | */30 * * * * |
| Hourly | 0 * * * * |
| Daily at Midnight | 0 0 * * * |
| Daily at 6 AM | 0 6 * * * |
| Weekly on Monday | 0 0 * * 1 |
| Monthly | 0 0 1 * * |
| Custom | Enter your own cron expression |
Cron Expression
This field fills in automatically based on the preset you select. If you choose Custom, type your own cron expression directly into this field.
Timezone
Select the timezone the schedule should follow. This ensures the job runs at the correct local time - especially important if your server and your team are in different time zones.
Schedule Type
| Type | What it means |
|---|---|
| Recurring | The job runs repeatedly on the defined schedule - every day, every hour, etc. |
| One-time | The job runs once at the scheduled time and does not repeat |
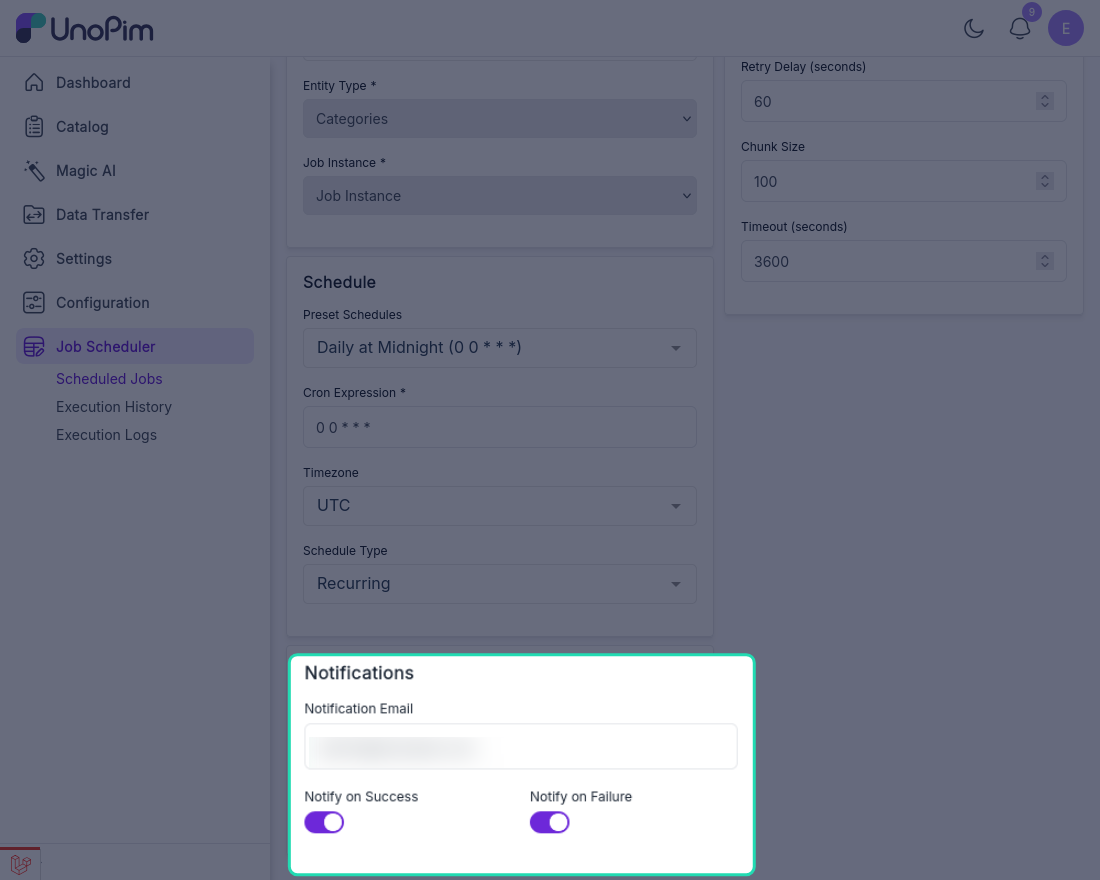
Notification Settings
Set up email alerts so you always know when a job succeeds or fails.
| Setting | What it does |
|---|---|
| Notification Email | The email address where notifications will be sent |
| Notify on Success | Sends an email when the job completes successfully |
| Notify on Failure | Sends an email if the job fails so you can act quickly |
Save the Job
Once all settings are configured, click Save Job. The scheduler will now run the job automatically at the defined time without any manual action.
You can view, edit, pause, or delete the job at any time from the Scheduled Jobs list.